Over the past few days we’ve been cutting up some of the Celotex 25mm ‘foam’ boards and putting them up in the roof ‘framework’. We spent some time thinking about how best to keep the van cool as we’re taking it to Africa, and whilst we’re no experts, we think what we’ve done makes sense. To us, anyway!
The idea is that reflective insulation materials (like the bubble wrap stuff which seems quite popular) need an air space into which the heat is reflected. As such, gluing it directly to the walls/roof means it won’t work as designed, yet seems to be a popular way of installing it. I guess that in the UK at least, reflecting heat back into the vehicle is a higher priority than keeping the heat out? We don’t have a huge amount of confidence that a couple of thin layers of plasticky bubble wrap is going to keep us cool/warm as required so we’ve decided to install Celotex 25mm foam boards, between battens (which are needed to support the plywood). These sit slightly away from the van walls themselves and gives us a good 3-5cm air space between the insulation and the external walls. Yes, we lose some internal space but we’re short so hopefully it won’t matter too much 🙂
I guess only time will tell how effective our strategy will be ; we’re going to make sure the inside face of each external panel in the rear is covered in insulation and the new bulkhead we’re making (between the cab and living area) will also be insulated. We’re hoping that by keeping the rear closed off during the day, and using reflective window blankets/covers, we’ll keep the worst of the heat out. We did consider installing air conditioning but its very expensive (£1500 upwards) and uses a lot of power (240v AC, so you need an inverter, which we’ll have, but not sure we want to use it that heavily). We might take a smaller, portable domestic air con unit if we think it necessary.
Anyway – installing the insulation. We’ve cut the boards up and covered their edges with reflective tape to stop any bits of foam from coming out and generally to stop them disintegrating as we’re driving along.

Cris putting the tape on the cut edges of the Celotex boards
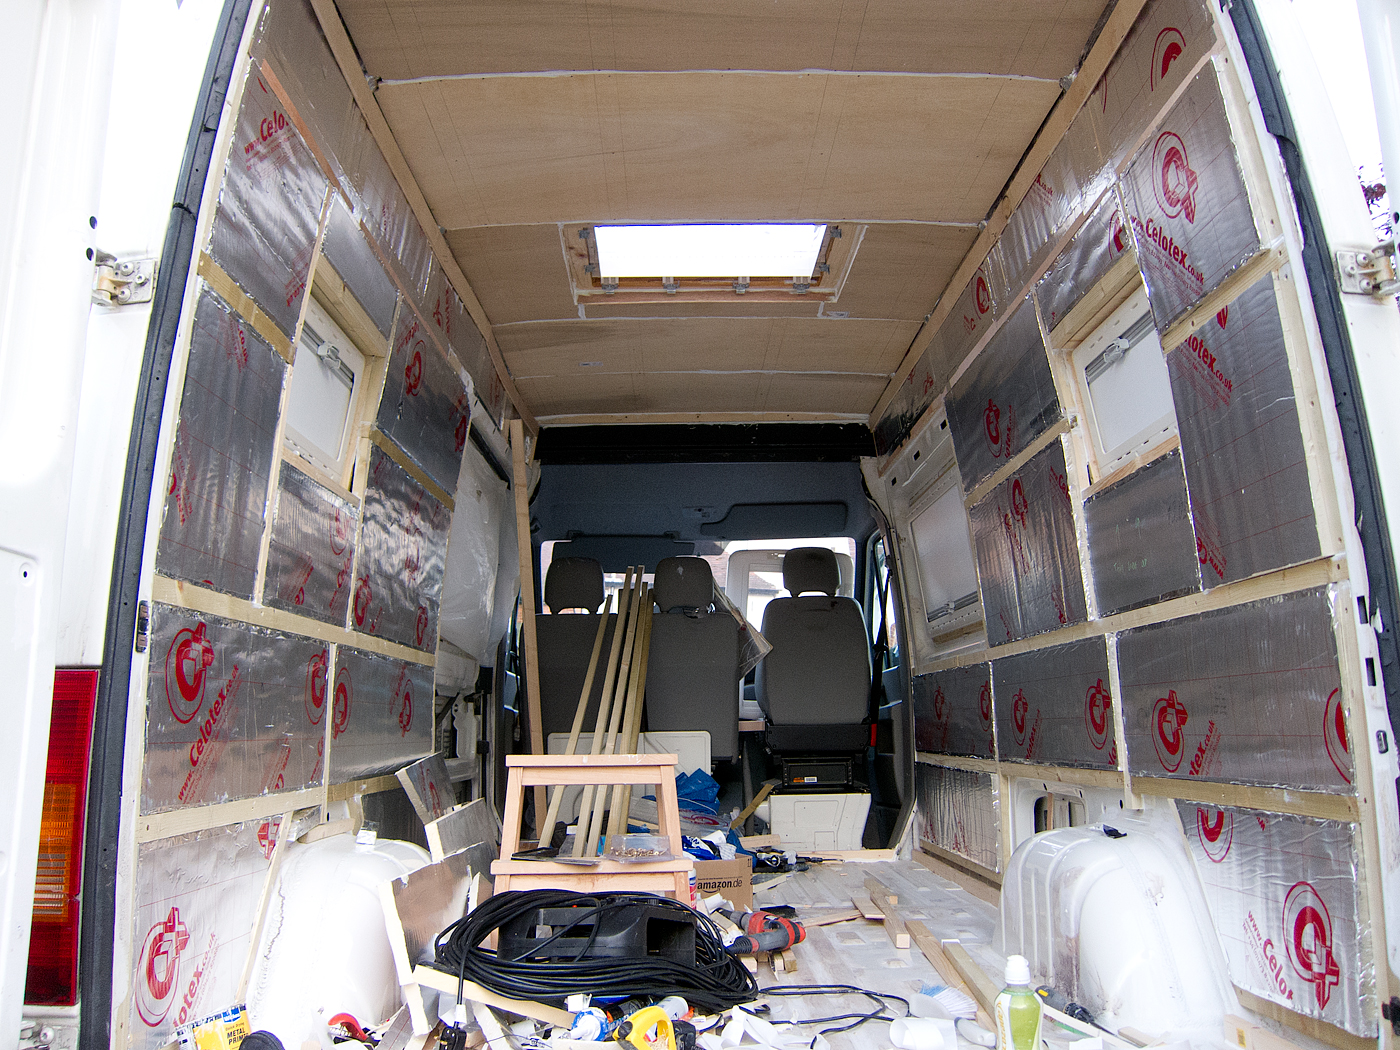
These are then glued (Sikaflex) into place in the rectangular spaces formed by the roof battens. To stop them pushing through to the other side (into the air space) we’ve glued small strips of 6mm plywood to act as ‘backstops’. This required 2 sections of plywood, as we’d used 18mm thick wood for the battens and the insulation is 25mm thick. So, small sections of 6mm ply were attached to the top side of the battens and then the longer strips of 6mm ply attached to those. Yes, we know that 18+6 = 24 but add some glue dollops here and there and you’re pretty much at 25mm 🙂 The boards will therefore be sandwiched between these strips and the main plywood ceiling. We’re hoping (we use that term a lot!) that the “backstops” won’t fall off, and the glue on the boards themselves will hold, otherwise they’ll be able to break free and fly around the air space 😦
As they say, a picture is worth a thousand words so:


Oh and we’ve used the reflective foil tape on the underside (living area side) to attach the insulation boards to each other and the battens.

Insulation is quite a time consuming process but we hope it works out for us ; walls and floor yet to do! Worst bits? Small bits of foam everywhere when you’re cutting the mats to size/shape, not using the right thickness battens in the first place (although it worked out ok in the end), tape sticking to itself all the time (pain in the backside and leads to much wastage), and generally quite fiddly, especially in the corners where the roof meets the walls.