Well its been a bit of a slog since the last update, but we’re nearly done with the plywood lining of the van now so thought it was time for a brief update. We did the plywood lining on the ceiling first, then the walls, then the floor. In hindsight, we probably should have done things the other way around, or at least the ceiling then the floor, as it would have made fitting the floor sections easier.
Category Archives: Ply lining
Roof plywood installed
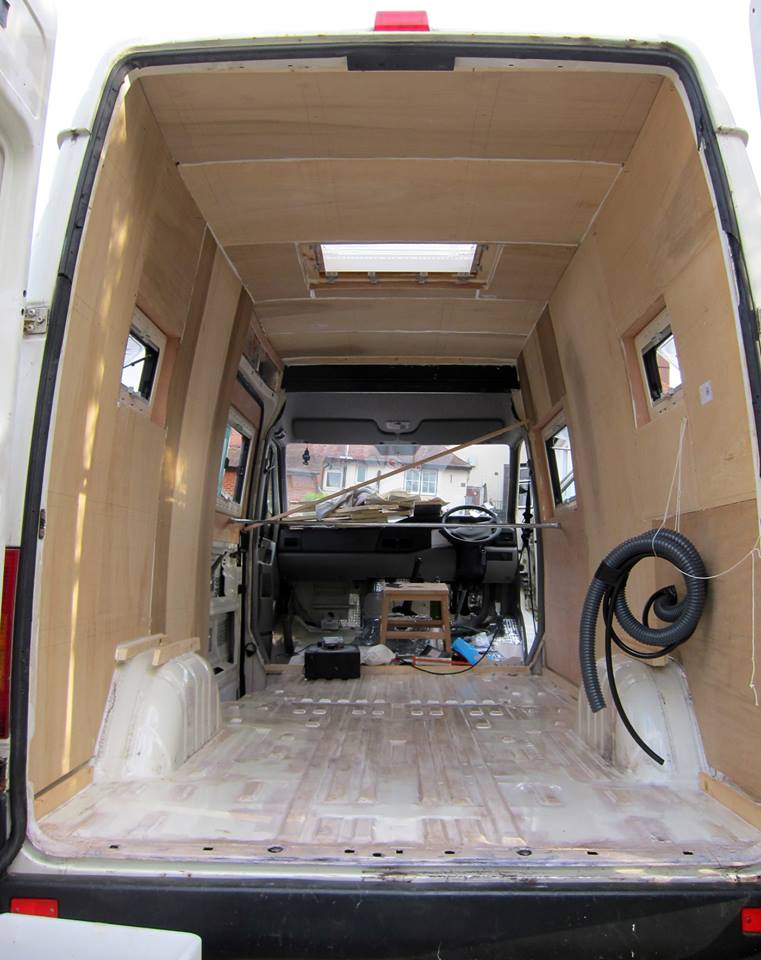
Once the roof framework had been fitted with its Celotex insulation, it was time to bite the bullet and put the plywood sheeting up.
We opted for 6mm ply, which seems to strike a nice balance between flexibility, weight, and (hopefully) durability. As with most of these decisions, only time will tell…
Rather than try to manhandle large sheets of plywood up onto the roof, we chopped them up to fit the gaps between roof battens, ie: the ones going across the width of the van which cover the metal beams. This makes each plywood sheet about 1.4m long (across the width of the van) and 50-75cm wide (along the length of the van). The trickiest area to deal with, not surprisingly, was the area around the roof hatch, which in the end I just chopped into 4 bits to save a whole heap of aggravation.
Any tips? Well, make sure you make a note of where you’ve put supporting battens, for starters. And if you’ve screwed them to the metal beams, making a note of where the screws are will help you decide where to put the screws through the plywood, if you’re going to do that. We drew a fairly detailed sketch of the layout of the battens before putting the plywood up, and have drawn the locations of the battens on the plywood sheets now they’re up. Hopefully this will help us decide where to put any fixtures/fittings.
Roof hatch installation
After putting it off for far too long, waiting for the right weather and all that, we finally got around to installing the roof hatch. The wooden frames for it, both internal and external, have been in place for a while now, so it was theoretically just a case of offering up the hatch, applying sealant/mastic, and screwing everything in place.
Theoretically…
The mastic/sealant (IDL99) was a royal pain in the ar*e to use, frankly. We applied it to the underside of the hatch, no major issues there, but also wanted to make sure the wood was as well sealed as possible, which possibly was our downfall. After a couple of hours of faffing around (mostly Cris to be fair, kneeling down on the roof of the van) we gave up and put the van “to bed” for the night. The next day we went out and Cris, with a hypodermic syringe from a sterile kit (last trip abroad) filled in the last remaining gaps.
Thankfully it had a few days to settle before the rains started to fall. So far, it seems to be weatherproof…
Preparing for plywood lining
So we haven’t got as far as installing the Midi Heki roof skylight yet, mainly because were staining the wood to make it waterproof (even though it’ll be covered by sealant) and the external aspect of the frame has been quite time consuming to make – ridges/grooves on 2 faces to match the hatch shape and the roof profiles. However, its mostly ready now, and the internal frame is already in place and glued. We’re now waiting for some butyl sealant to arrive so we can put the whole thing together.
Whilst waiting for all that, we’re starting to work on the plywood lining, or more accurately, the softwood framework/battens which will support the plywood. We want to do the roof first, so are concentrating our efforts there. We’ve installed a couple of horizontal battens along the length of the van at about 1.5m height, where there is already a flat area. We’ve attached the wood (18mm thick x 44mm wide) using a combination of screws and Sikaflex glue, so it shouldn’t be going anywhere soon. On top of this, roughly following the angle we expect the plywood to take when its fitted, we’ve installed a series of shaped battens which sit either side of each of the internal structural beams, allowing us to glue/screw the plywood into something that isn’t touching the van bodywork (reducing the potential for cold bridges/condensation).
We’re also working on the replacement for the manky (removed) metal bulkhead, which will be made of softwood battens, plywood faces, and insulated, and will have a door in it leading to the cab. All of this should come together over the next few days and will help support the battens we’re planning to attach to the structural members in the roof. It’ll make sense in the next few days (hopefully!)